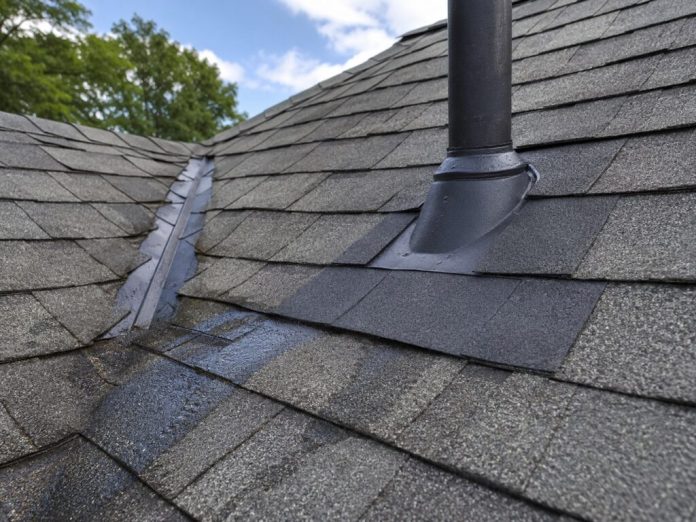
Adding skylights to a residential or commercial property is one of the most effective ways to introduce natural daylight, enhance architectural aesthetics, and improve indoor ventilation. Sunlit interiors feel larger, more inviting, and require less artificial lighting throughout the day, leading to noticeable energy savings. However, because a skylight penetrates the primary water-shedding surface of a building, the roof deck, it requires precise installation techniques and robust weatherproofing details.
Improperly installed or poorly flashed skylights represent a frequent source of sudden roof leaks, interior ceiling damage, and thermal loss. Understanding proper installation protocols and routine maintenance practices ensures your skylight delivers maximum light and ventilation without compromising the building envelope.
Key Considerations Before Installing a Skylight
A successful skylight project begins long before cutting through the roof deck. Property owners must evaluate several structural and environmental factors to ensure long-term performance:
-
Mounting Style Selection: Skylights generally come in deck-mounted or curb-mounted configurations. Deck-mounted units attach directly to the roof sheathing with an integrated frame, ideal for steeper pitches. Curb-mounted units sit atop a wooden curb built above the roof line, providing exceptional leak protection on low-slope applications.
-
Glazing and Thermal Performance: High-performance skylights feature tempered, low-emissivity (Low-E) double or triple-pane insulated glass. Low-E coatings reflect infrared solar heat while allowing visible light to pass through, keeping interior spaces cooler during summer and warmer during winter.
-
Roof Pitch and Orientation: Placing skylights on south- or west-facing roof slopes maximizes winter solar heat gain but may require motorized shades to control summer glare. North-facing skylights offer consistent, diffused illumination without excessive heat buildup.
-
Condensation Control: In humid interior spaces like kitchens and bathrooms, temperature differences between indoor air and cold outer glass can cause moisture to form on the frame. Selecting skylights with built-in condensation channels and warm-edge spacers helps divert moisture outward.
Critical Step-by-Step Leak Prevention Methods
The single most important aspect of skylight performance is the flashing and sealing assembly around its perimeter. Water moving down a roof slope must be seamlessly routed around the unit without reaching the underlying deck.
| Installation Component | Technical Function | Primary Leak Prevention Benefit |
|---|---|---|
| Self-Adhering Membrane | Flexible ice-and-water shield wrapped around the curb and deck | Provides a continuous secondary waterproof barrier against wind-driven rain |
| Step Flashing | Interlocking L-shaped metal pieces woven between each shingle course | Diverts water flowing down the roof slope outward onto shingle surfaces |
| Head and Sill Flashings | Solid metal pans positioned at the top and bottom of the unit | Directs water safely around the top and discharges lower runoff cleanly |
| Integrated Cladding | Snap-on aluminum or copper covers protecting wood frame joints | Shields internal wooden frames from direct weather exposure and UV rot |
When planning daylighting additions or replacing aging units, consulting experienced professionals for skylight installation NY ensures that flashing kits, structural framing, and underlayments meet rigid regional building codes.
Common Causes of Skylight Leaks and How to Avoid Them
When a skylight leaks, the root cause is rarely a cracked glass pane. Instead, moisture intrusion almost always stems from perimeter seals, aging flashings, or installation errors:
1. Failure to Use Step Flashing
Relying solely on roof cement, caulk, or a single metal apron rather than individual step flashing pieces will inevitably result in water intrusion as sealants dry out and crack over time.
2. Clogged Water Channels
Leaves, pine needles, and airborne silt can collect behind the head flashing or along side channels, creating small dams that force water sideways underneath shingles.
3. Improper Counter-Flashing Integration
Counter-flashings must fit snugly into the skylight frame cladding to prevent driving rain from blowing upward into the joint.
4. Poor Interior Air Sealing
Unsealed gaps between the skylight light shaft and surrounding attic insulation allow warm, moist house air to rise into the cold skylight cavity, creating interior condensation that mimics an active roof leak.
Maintenance Checklist for Long-Term Performance
To keep skylights crystal clear and completely watertight, facility managers and homeowners should perform routine bi-annual checks:
1. Clear Surrounding Debris
Remove accumulated leaves, branches, and moss from above and around the top head flashing at least twice a year.
2. Inspect Exterior Sealants and Cladding
Check perimeter rubber gaskets and metal cladding screws for tightness, replacing worn sealants before winter weather arrives.
3. Clean Interior Condensation Trays
Ensure interior weeping channels and frame gutters are free of dust so trapped moisture drains out properly.
4. Check Light Shaft Insulation
Inspect attic insulation surrounding the skylight shaft to verify that thermal barriers remain intact and dry.
By combining high-performance glazing, multi-layered flashing assemblies, and routine maintenance, property owners can enjoy the beauty and energy benefits of natural overhead sunlight with total peace of mind.